October 7,2021
Magento 2 Guide: Setting up Tax Rules, Zones and Rates
Having the correct tax settings in place makes sure that some of the fundamental parts of your Magento store work correctly.
The system for setting up tax zones is quite intuitive in Magento, with a lot of options to set them up on a country, state, zip/post code basis. This can then be applied to specific customer groups.
Without setting the tax up on your Magento store, when calculating the tax in the shopping cart it will show 0, any invoices generated by the system will not show the tax amount, so it is important to set these up correctly.
When setting up the tax classes in Magento 2, there are 2 parts to this. The first is specifying how much the tax is and what geographical locations it applies to, this is defined by the Tax Zones and rates. The second is who (which customers) it applies to, which is defined by the Tax Rules.
So, we’re going to look at what you’ll need to do to set this up, with an example of what would be needed for the UK tax to apply. To begin with we need to set up our tax amount.
Need help with Magento?
We are experts in Magento, with experienced designers, developers & marketers. If you need a hand, get in touch.
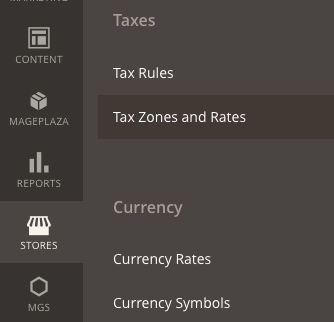
Adding tax zones and rates in Magento
Overview
- Login to Magento admin
- Go to Stores > Tax Zones and Rates
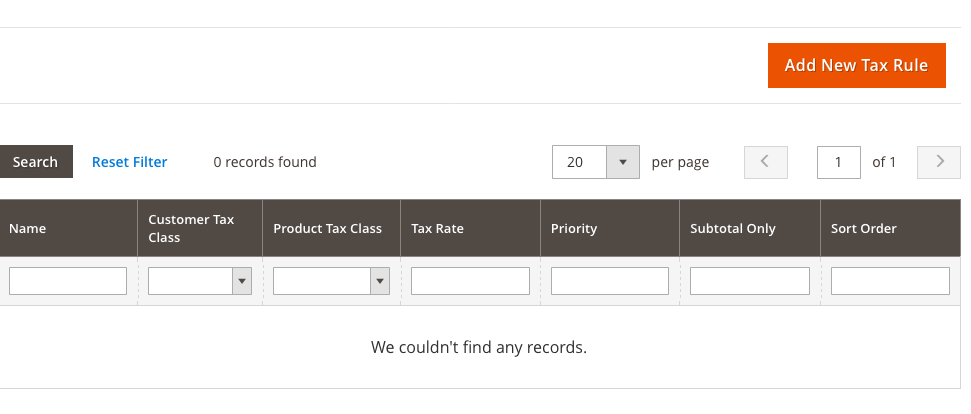
- Click the Add New Tax Rule
- Tax identifier: name of the tax
- Zip/post code range: tick if needed
- Zip/post code: if range needed enter range, if blanket cover put *
- State: select state it applies to
- Country: select country it applies to
- Tax rate: enter the amount of tax
- Save to finish
Full description
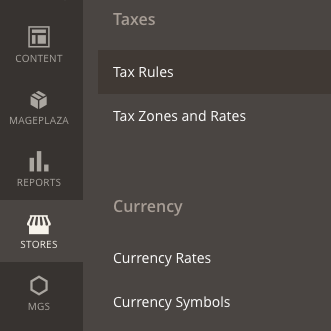
Login to your Magento admin area and navigate to Stores > Tax Zones and Rates.
Click to add a new tax rate, you’ll then be shown the options you have for this.
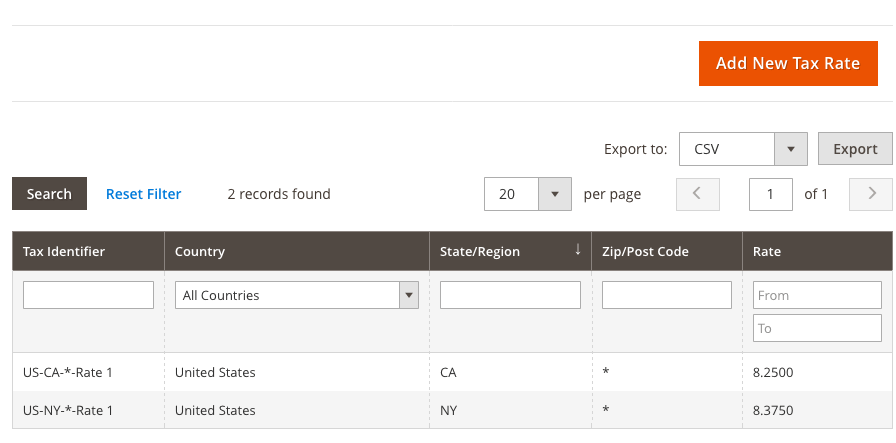
The options you have are:
- Tax identifier: what you will name the tax
- Zip/post code range: if you need to apply this to a specific range of zip/post codes, tick this.
- Zip/post code: here you will enter the range of the zip/post codes that you want this tax rate to apply to, if it is to be applied to the whole state/country, simply put * (the catch-all).
- State: the state the tax rate will apply to.
- Country: the country the tax will apply to
- Tax rate: enter the amount of tax
So for example, if we were to set this up for UK VAT at 20%, the final result would be:
Tax identifier: UK-tax
Zip postcode range: (unticked)
Zip/Post Code: *
State: (leave blank)
Country: United Kingdom
Rate Percent: 20

Save and you’ve now created the tax zone. Next, we’ll need this to be applied to the applicable people/places, to do this we will need to add a Tax Rule.
Adding a Tax Rule
Overview
- Login to Magento admin
- Go to Stores > Tax Rules
- Click Add New Tax Rule
- Name: label for your tax rule
- If you have a range of tax zones that need applying, these can be imported via a .csv, otherwise select Tax Zone and Rate you’ve created
- Expand additional settings
- Customer class: the customer groups you want this applied to
- Product tax class: Taxable goods
- Priority: set the priority of the tax rule
- Calculate off subtotal only: If you want taxes to be based on the order subtotal, mark the checkbox
- Sort order: choose how this will be ordered
- Save rule and finish
Full description
To add a Tax rule, login to your Magento admin area and head to Stores > Tax Rules.
Click the add new Tax rule button, and you’ll be presented with this page.
Now you’ll need to fill in your tax rule data, for this you will need to work through the list below:
- Name: the name of your tax rule.
- If you have a number of tax zones that need adding, these can be imported via a .csv, which will add these as tax zones and rate, otherwise, you can create a new tax zone and rate or select the existing ones you want it to apply to.

- Expand additional settings to see the other options.
- Customer class: you can choose the customer groups you want this to apply to.
- Product tax class: where you want the tax class to apply e.g. taxable goods, so that you can automatically apply this to products with the ‘Taxable Goods’ state.
- Priority: you can tell how Magento prioritises the tax rules, if two rules have the same priority, then the taxes are added together, otherwise the taxes are compounded.
- Calculate off subtotal only: If you want taxes to be based on the order subtotal, rather than the individual products, mark the checkbox.
- Sort order: choose how this will be ordered in comparison to the other tax rules that you have.
So for example, if we were to apply a tax rule for the UK, it would be:
Name: UK tax
Tax rate: select the tax rate that you want to apply (e.g. the one we created under tax rules)
Under Additional Settings
Customer tax class: select all customer groups
Product tax class: Taxable Goods
Priority: 0
Calculate off subtotal: (unchecked)
Sort order: 0
Save the rule to finish and you’ve now applied your tax zones and rates and tax rule. From this, when you select a product Tax Class as Taxable Goods, the specified tax amount will be applied to it.
We are a experienced Magento Agency, working with brands both large and small. If you need any help with your Magento Store, get in touch with us today!