But how do they find you, know your website even exists?
If you’ve just launched a brand new eCommerce website, unless you've told anyone, how do are search engines (and also people) going to know it exists.
They need to know you exist, but how do we accomplish this?
The simplest way to do this is by telling them with an XML sitemap.
What is an XML sitemap?
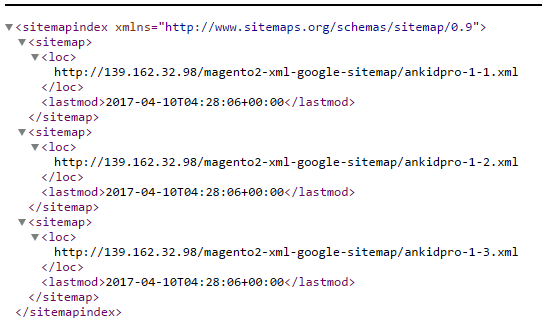
An XML sitemap is a list of all the important pages on a website. These are created to allow search engines to know of all the pages on a website, that helps them to better understand its structure. It also tells them when a page was last updated, letting search engines know if they need to recheck a page to see what has changed.
What you need this for is so that search engines know your website exists, and we’ve already mentioned that Google has the most use of all of them (so you’ll want to make sure they know your website exists). So you need to create your XML sitemap and upload it to Google.
This can be done by creating a Google search console account for the website and uploading the XML sitemap to it (this can also be done for Bing).
How to create and upload an XML sitemap in Magento 2
Overview
Marketing > SEO & Search > Site Map
Add Sitemap
Name the file (sitemap.xml)
Set the path (/)
Save & Generate
Log into Google search console
Crawl > Sitemaps
Add/Test Sitemap
Enter sitemap location (sitemap.xml)
Submit
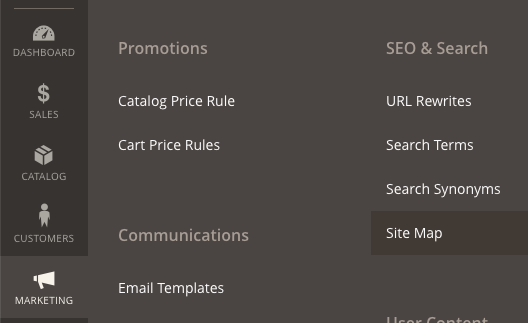
First, after we’ve logged into our Magento store, we go to Marketing > SEO & Search > Sitemap in the menu.
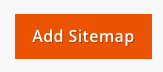
Here we’re presented with a page that will hold your sitemaps once created. Click the Create sitemap button to get started.
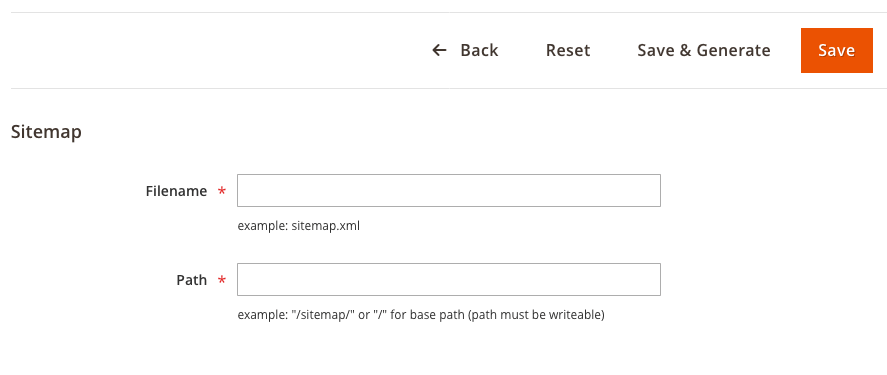
Here, the setup is pretty straightforward. You need to create a filename, this name isn’t merely an identifier, but rather the file page and we’ve got to create the path to it, so if we’re creating an XML sitemap, we can call it sitemap.xml
Next, we need to say where in the file structure the information will be stored. Unless there’s somewhere specific you want to save it, simply put /, this will then save it from the base.
Hit save and generate and wait for the sitemap to be created. Once it is, you can check it’s working properly by heading to the file location (in this case at: yoursite.com/sitemap.xml).
Now, you’ll need to upload it to your Google search console (if you don’t have an account it’s simple to set up).
Once you’re in the account, we’ll want to go to Crawl > Sitemaps.
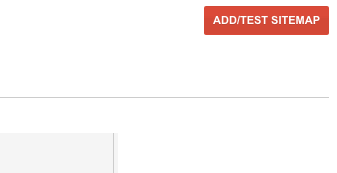
In the top right of the page there will be a red “Add/Test Sitemap” button. Click this then add the path where your sitemap is located (in our case: sitemap.xml).
If you want to test to make sure it works, do that then repeat the steps above to submit, otherwise, hit the submit button. It will then prompt you to refresh the page, once you’ve done this, you will see that your sitemap has been submitted.
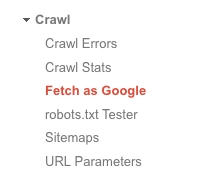
Pro Tip: To help things along, and get Google looking through your website, head to Crawl > Fetch as Google.
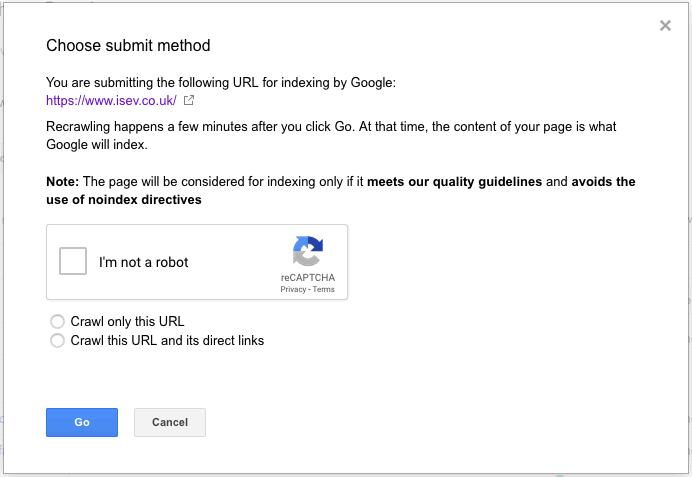
Here, you can request Google to check pages yourself. For us, we want Google to start checking the website, so hit the Fetch button (this will then check the homepage). The page will then load your home page. Hit the “request indexing” button next to it and you’ll get this pop-up.
Submit the Captcha and select to crawl this URL and its direct links. This will the instruct Google to check through all of the website :)
Changing the XML sitemap settings
For the more advanced/those who want more control over the XML sitemap in your Magento store, there are additional controls you have to increase the frequency they’re checked and the page priority. (For this, the examples will use a non-eCommerce website, but the steps are exactly the same).
To get to the options, head to Stores > Settings > Configuration.
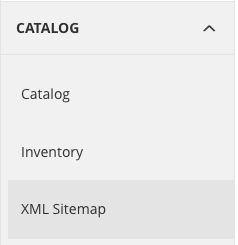
Once here, we’ll want to navigate to Catalog > XML Sitemap.
Here we’re presented with the options to change the options for:
Categories
Products
CMS pages
General settings
File limits
Add to robots.txt
Generally, if you’re unsure about changing these settings, it’s safe to leave them as default.
We are a experienced Magento Agency, working with brands both large and small. If you need any help with your Magento Store, get in touch with us today!